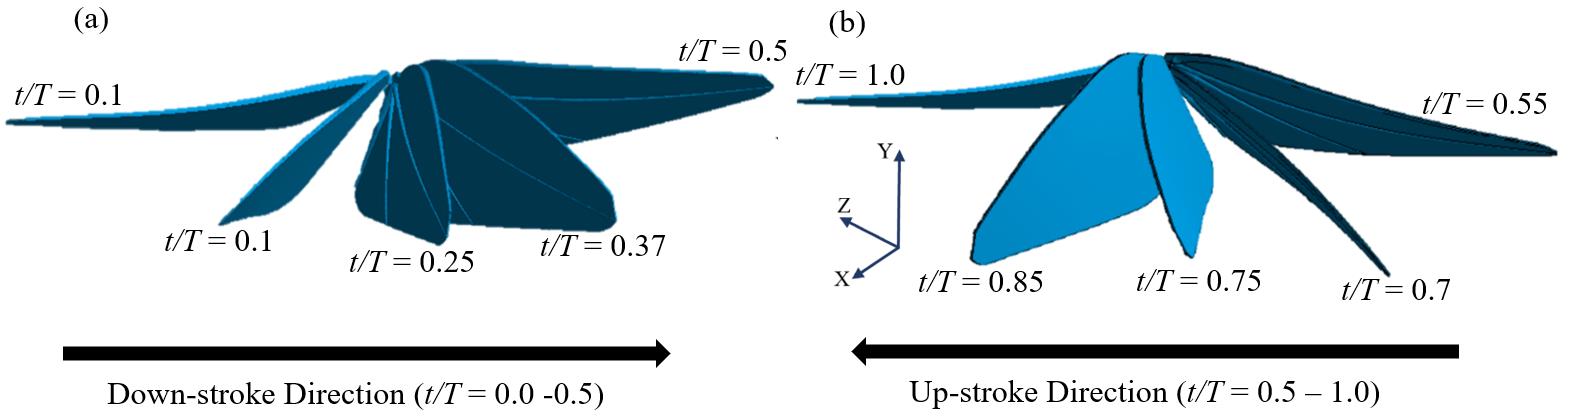
Figure 4: (a) Wing position for Wing S3S4 for the down stroke, (b) wing position for Wing S3S4 for the upstroke Figure 4: (a) Wing position for Wing S3S4 for the down stroke, (b) wing position for Wing S3S4 for the upstrokePosted on November 3, 2021